Homemade PayDay Bars
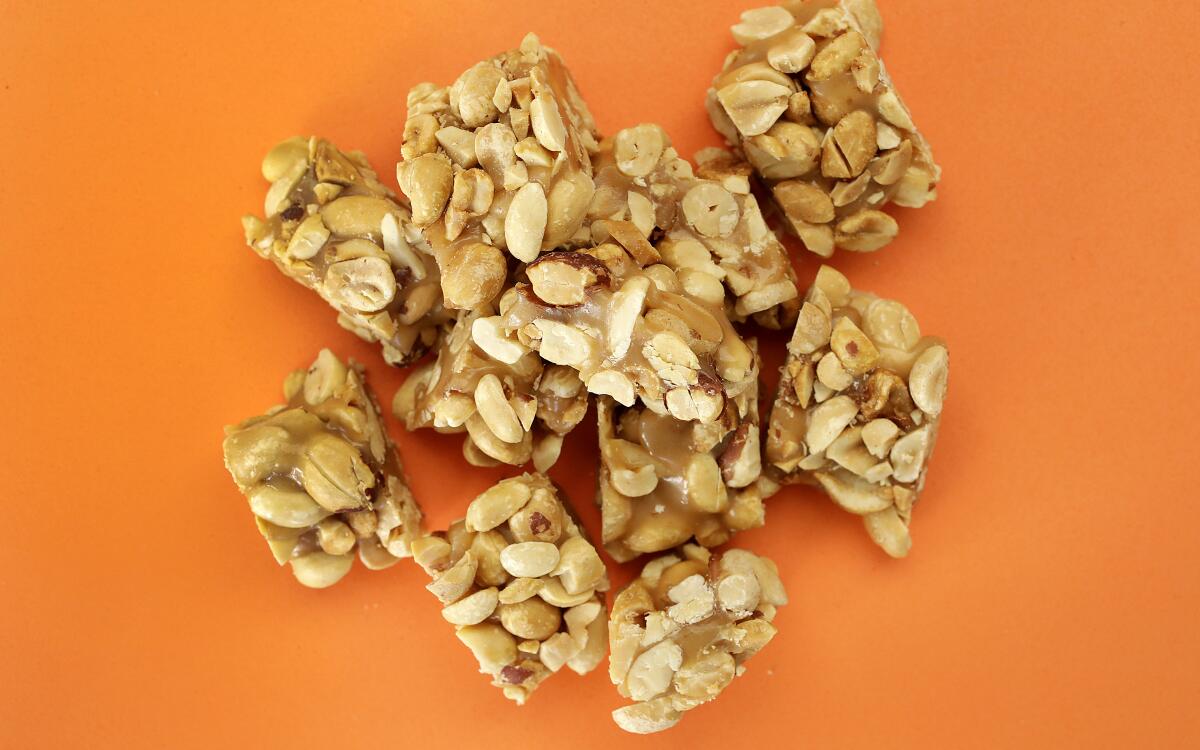
In this candy bar, a chewy, caramelized milk toffee is surrounded by roasted, salted peanuts — an unbeatable combo. If you’re allergic to peanuts, you can make this candy with any other toasted nuts. And if you like Baby Ruth bars, simply cover these bars in chocolate.
As with all candy making, be careful when cooking sugar, because it can cause serious burns if it gets on your skin. If that does happen, immediately submerge your arm in ice water to instantly seize and cool the syrup.
Prepare your workspace: Fill a medium metal or glass bowl with the hottest possible tap water and place it in your sink. Likewise, fill a 2-cup heat-proof glass liquid measuring cup with the hottest possible tap water too, then place a candy thermometer in the water. Place a paper towel next to the measuring cup.
Pour half the peanuts onto a rimmed baking sheet lined with parchment paper or foil. Pour the other half onto a cutting board and roughly chop them so there are no whole peanuts or halves. Scrape all the chopped peanuts, including any peanut “dust” stuck to the cutting board, onto the baking sheet and combine the two peanuts together so there’s an even mix of whole and chopped nuts. Smooth the peanuts into an even layer, then use your index finger to gently form four equally spaced channels in the peanuts that run the length of the baking sheet.
In a 2- to 3-quart saucepan, add the sugar, condensed milk, corn syrup, butter, salt and 1/4 cup water and stir to combine with a long-handled, heatproof silicone spatula or wooden spoon. Place over medium-high heat and stir until the butter completely melts.
Remove the candy thermometer from the water and attach it to the side of the saucepan. Continue cooking the syrup, stirring steadily to prevent the dairy solids from scorching on the bottom of the pan, until the temperature of the syrup reaches 238 degrees. Turn off the heat but leave the pan on the stove.
Working quickly but carefully, use a kitchen towel to remove the thermometer from the pan (it will be hot) and place it in the bowl of hot water in the sink. Pour out the water in the measuring cup and dry the inside quickly with the paper towel. Pour the syrup from the saucepan into the measuring cup, scraping it from the pan to ensure you get out all the syrup. Place the spatula and saucepan in the bowl of hot water in the sink.
Immediately but with a steady hand, pour a 1 1/2-inch-wide ribbon of syrup down the center of each channel to fill them. You should have enough syrup to fill all four channels. Once you fill them, use any leftover syrup to fill in any thin or unfilled portions of the channels so all the candy ribbons are even; place the measuring cup in the bowl of hot water in the sink.
Let the candy ribbons stand for 1 minute, then use a small spoon to dig up all the loose peanuts around the ribbons and spoon them over the exposed syrup so the ribbons are completely covered in nuts. Let stand for 5 minutes to cool and firm up. Using kitchen gloves or your bare hands (it’ll be hot but shouldn’t burn you), massage each rope, pressing peanuts into the candy rope, to form it into as even and round of a cylinder as you can. Let the ropes stand until the candy is completely cooled, at least 30 minutes. This is a great time to clean your equipment (see “Cleaning Your Equipment” below).
Using a sharp knife, cut each rope into 1-inch lengths for mini bites or 2-inch lengths for bars. Transfer each piece to a wrapper, if you like, and close to seal. Save any leftover peanuts for another use.
Once you’re finished making your candy, fill the pot in which you cooked the candy with water and place your thermometers, stirrers and measuring cups in the water too. (If your measuring cup won’t fit, use a bigger pot to clean it.) Bring the water to a boil and let boil for 5 minutes. Pour the boiling water out, then check to make sure any stuck-on candy bits have been dislodged; if not, repeat boiling with fresh water. Let everything cool before you hand-wash with soap and water (or place utensils in the dishwasher).
Get our Cooking newsletter.
Your roundup of inspiring recipes and kitchen tricks.
You may occasionally receive promotional content from the Los Angeles Times.


