Classic Red Enchiladas
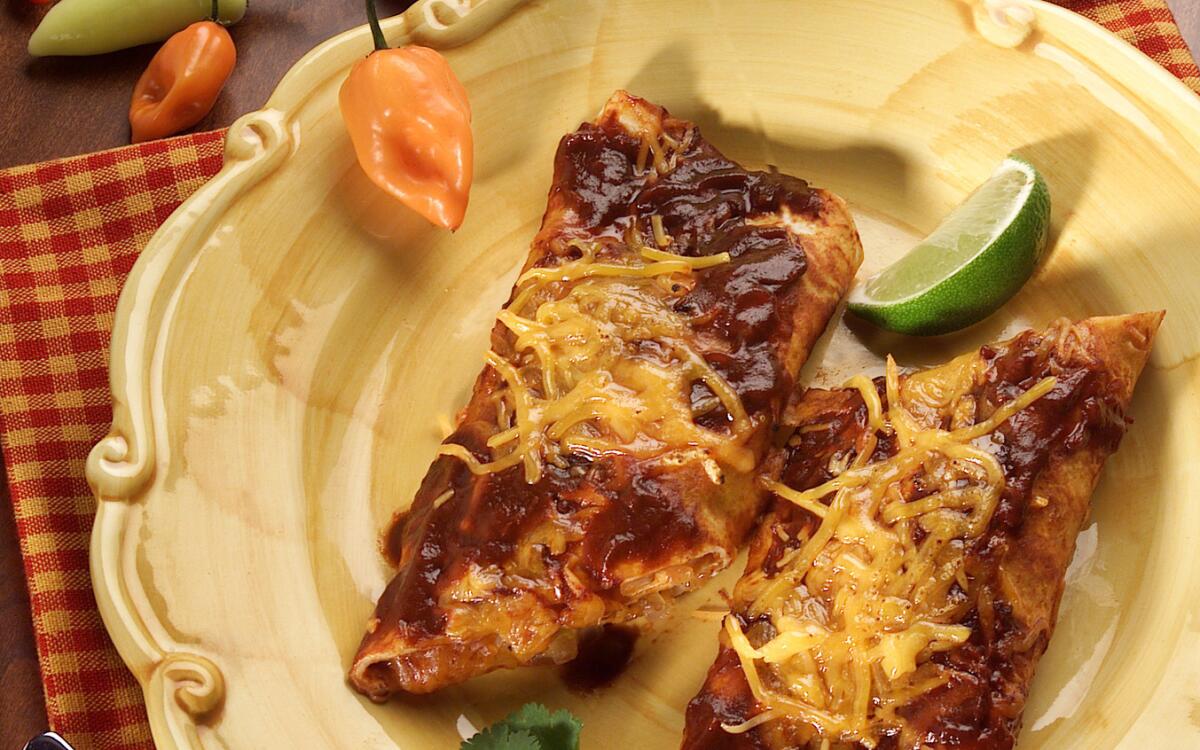
The red enchilada ultimately symbolized the fusion of Mexican foods and some of the favored ingredients brought over from Spain such as olives, olive oil and cheeses. These enchiladas, done Californio-style, were served at every important event but especially at barbecues.
Enchiladas made with thin flour tortillas puff more, but if you prefer corn tortillas, it is best to use day-old ones and fry them in a few teaspoons of light olive or canola oil. They need to be heated, not only to soften them, but also because it helps to seal the surface, which keeps them from disintegrating when sauced. If the flour tortilla is supple, it doesn’t have to be heated or fried. It can be dipped and coated with red chile sauce and then filled.
From the story: The Whole Enchilada
Oil 2 (15x10-inch) jellyroll pans.
Heat 3 tablespoons of olive oil in a large skillet over low heat. Add the onions; cook, stirring frequently, until softened, about 20 minutes. Season with salt and pepper to taste and the oregano.
Spoon 1 cup of red chile sauce onto a wide dinner plate. Starting with 1 tortilla, dip both sides in the sauce. Place 1/2 cup of grated cheese, 2 olives and 1/3 cup of cooked onions down the middle of the tortilla. (We never added grated hard-boiled eggs, but many rancho families did.) Lastly, roll the sides of each tortilla over the filling. Place the enchilada, folded side down, on one of the pans. Repeat with the remaining tortillas. Pour the remaining red chile sauce over the enchiladas. Sprinkle the remaining cheese in a strip down the middle of each enchilada. Decorate with any remaining olives. Cover the pans and refrigerate the enchiladas until you are ready to bake them. Let them stand at room temperature 1 hour before baking.
Heat the oven to 350 degrees near serving time.
Bake the enchiladas until they are puffed and the cheese has melted, 20 to 25 minutes.
Red chile sauce
Hold the California and ancho chiles under running water to rinse. Use scissors to cut off the chiles stems and cut the chiles in half. Shake out the seeds onto a paper towel. (Put the seeds in your garden for the birds.) Place the chiles and garlic in the top half of a steamer set over simmering water. Steam for 25 minutes. This technique, as opposed to soaking dried chiles in boiling water, preserves more of the chile flavor.
Remove the chiles from the heat. Place 1/3 of the chiles in a blender with 1 cup of water. Puree until smooth. Pour the puree into a wire strainer nested over a large bowl. Continue pureeing the rest of the chiles, garlic and water as in the previous step, in batches, so that each time you add 1/3 of the chiles. Push all of the chile puree through the strainer using a spatula or wooden spoon. Be sure to scrape off the chile puree clinging to the bottom of the strainer. Pour the remaining water into the blender and turn it on to help clean the blades. Pour this chile water through the strainer to catch the last bit of goodness. You should now have about 3 1/2 cups chile puree.
Heat the olive oil in a deep skillet over medium heat and add the flour, toasting lightly until light nut brown, stirring, 4 to 5 minutes. Whisk in the chile puree and add the oregano, vinegar and salt. Simmer the sauce for 20 minutes to blend flavors. Taste, and if the sauce seems a bit sharp, add sugar. If the sauce seems thick, add water or broth, simmering again for about 5 minutes.
Get our Cooking newsletter.
Your roundup of inspiring recipes and kitchen tricks.
You may occasionally receive promotional content from the Los Angeles Times.


